Blue Screen of Death errors (BSOD) on Windows are pretty common.
Some go away after you restart the PC, while others can persist and prevent you from booting to the desktop.
CLOCK_WATCHDOG_TIMEOUT is one such BSOD error affecting Windows 10 and 11 users.
This error code indicates a communication problem between your PC and the CPU.
This error appears when a System takes longer than the time allotted by the CPU to provide an output.
Many users report this error while playing games, running heavy applications or while copying large files in Windows.
Why Does a Clock Watchdog Timeout Error Occur?
- Excessively overclocking the RAM, CPU, or other system components.
- Outdated or corrupt system drivers.
- A loosely connected system component or cables.
- Faulty or damaged system components.
How to Fix Clock Watchdog Timeout Error
Try the following methods to resolve this BSOD error in Windows.
1. Check Hardware Connections
Loose or ill-fitted cables and components such as RAM, GPU, or CPU can result in random BSOD errors. So, open your PC cabinet and check if everything is snugly fitted.
While you are at it, remove the RAM and GPU, clean their connection heads, and reseat them in their respective slots.
2. Update Drivers
Driver corruption is a common reason for Windows to run into BSODs while trying to access hardware. To fix this, you must update all the system drivers using the Device Manager. Here’s how:
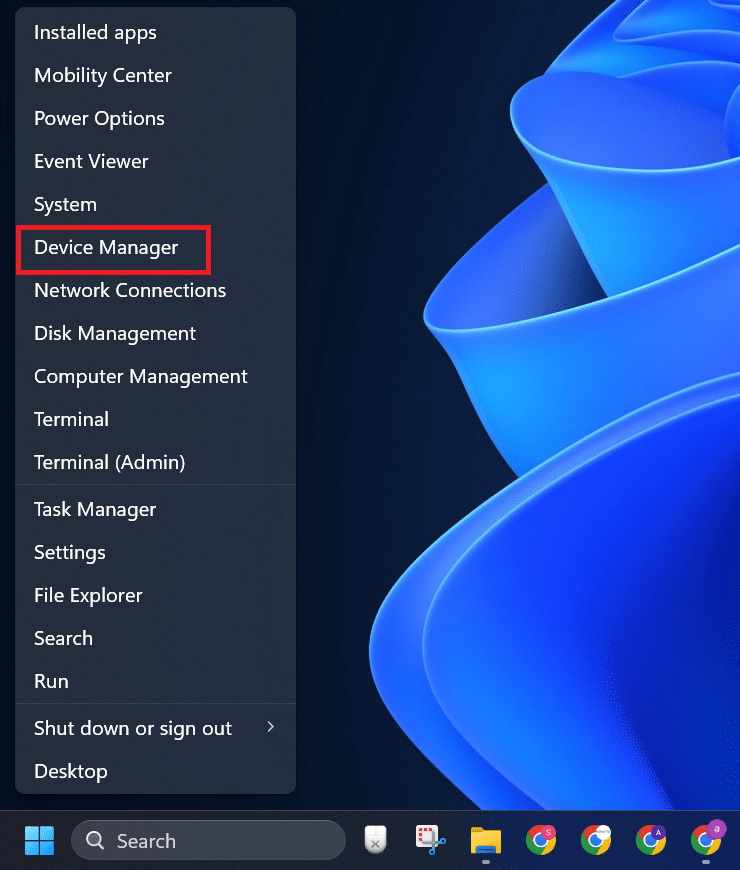
- Right-click on the Start button and select the Device Manager option.

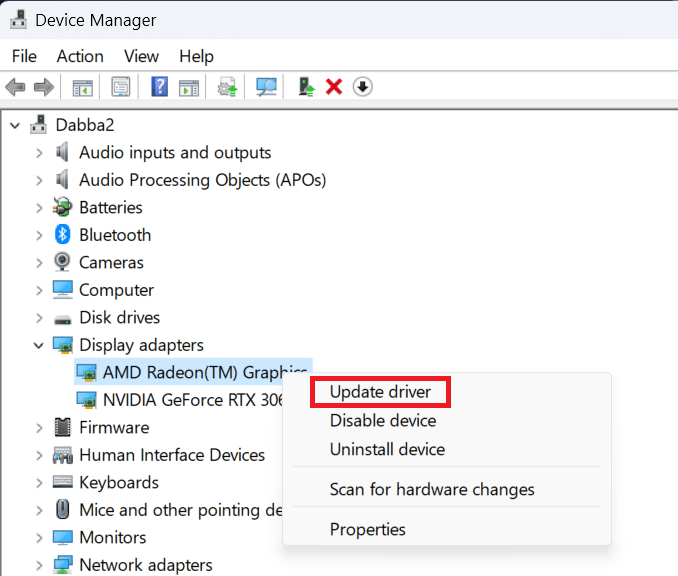
- Find the device with a yellow warning sign and right-click on it. Select the Update Driver option.

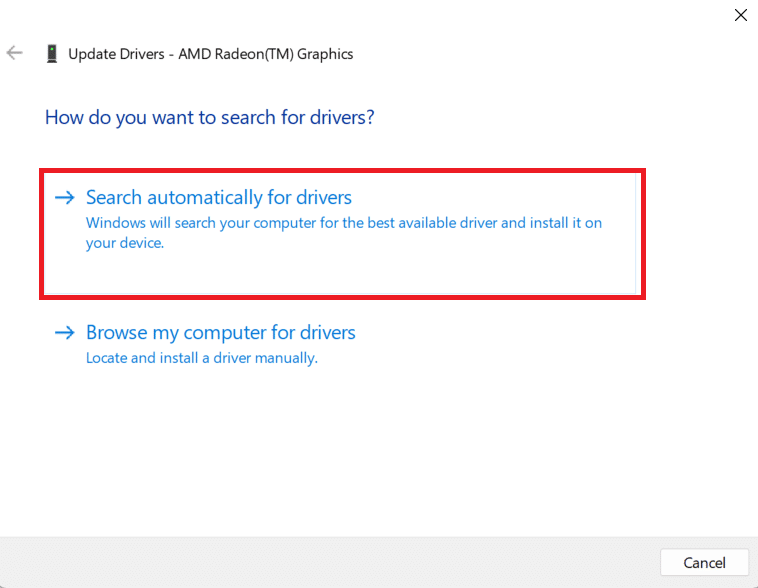
- Click on the Search automatically for drivers option.

- Close the window after the download completes.
If you don’t find any updates via the Device Manager, download them from the manufacturer’s website.
If you use a laptop or a pre-built rig, you can use the official driver download tool to install all the updates, including BIOS updates.
Otherwise, you must download drivers for each system component (CPU, GPU, Bluetooth, Wi-Fi, etc) from their respective manufacturer’s websites.
3. Check RAM With Windows Memory Diagnostic Utility
Windows Memory Diagnostic is an inbuilt tool for finding problems with system memory. You don’t need to install it separately.
Here’s how to use it:
- Press Win + S to open Windows Search. Type mdsched in the text box and press Enter.


- Click on the “Restart now and check for problems” option.


- Wait for the PC to restart and check the RAM. It will then reboot to the desktop.


- Log in to your PC. If everything’s fine, you will see the “No memory errors were detected” notification.
Otherwise, your RAM needs reseating or replacement.
4. Disable Overclocking
Overclocking gives you a slight boost in performance, but that tends to raise the system temperature.
Windows can encounter the CLOCK_WATCHDOG_TIMEOUT error if your PC is overheating.
You must turn off any overclocking settings you have applied from the BIOS or via a third-party app.
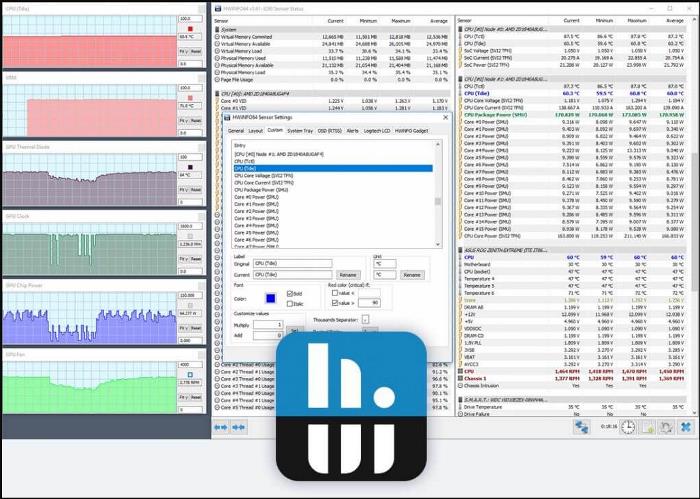
After removing the overclocking settings, check the system temperature using Core Temp or HWiNFO for signs of overheating.

You can also use programs like Prime95 to stress test the CPU and check for faults.
5. Reset BIOS Settings
After updating the BIOS, reset the settings to its default configuration. Here’s how to do it:
- Restart your PC and press the appropriate F-key or Esc key to open the BIOS settings.
- Navigate to the Exit tab.
- Select the Load Default Settings option using the arrow keys and press Enter.


- Select the Yes option and press Enter.


- Exit the BIOS and boot to the desktop.
- Check if the Clock Watchdog Timeout error occurs now.
6. Run a SFC and DISM Scan
SFC and DISM can fix corrupt system files and service the Windows Image. For some users, missing system files produced this BSOD error, so it is worth a try:
- Press Win + S to open Windows Search. Type cmd in the text box and press Ctrl + Shift + Enter keys.


- Click on the Yes button to open the Command Prompt.


- Type sfc /scannow command and press Enter.


- After that, run the DISM /Online /Cleanup-Image /RestoreHealth command.


- Wait for both scans to complete and restart your PC.
7. Identify Problems Using Safe Mode
You can quickly identify a problematic app using Safe Mode. This is also useful if you cannot boot to the desktop and are stuck in the Windows Recovery Environment (WinRE).
Repeat the following steps:
- On the Windows Recovery Environment page, click on the Troubleshoot option.


- Click on the Advanced options.


- Select the Startup Settings option.


- Click on the Restart option.


- Press the F4 key to boot into Safe Mode.


- Now, check if the system runs fine without any issues.
You can also try applying a System Restore point to check if a recent app or update installation is causing the error.
8. Reinstall Windows
If the Clock Watch Timeout error still occurs, you must reinstall Windows. To do that, create a bootable USB installation media with Rufus or Media Creation tool.
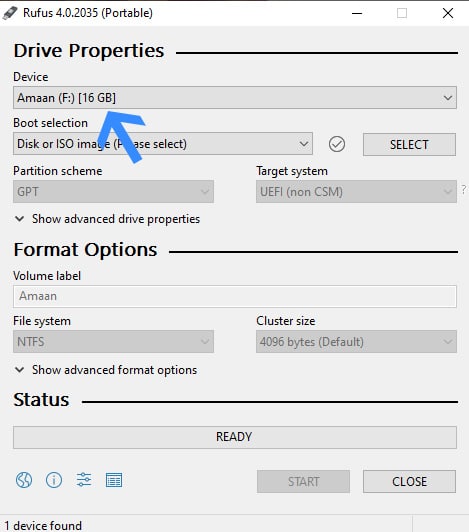

Plug in the USB drive and select it on the Boot Devices page. Install Windows and all the system drivers to check if the BSOD error is fixed.
Otherwise, you must get the hardware checked by a technician and replace the faulty parts with new ones.
Fix BSOD Errors
These were the eight methods to fix the Clock Watch Timeout error in Windows 10 and 11.
Inspect the hardware connections, update drivers, and check the RAM.
Then, turn off overclocking, reset BIOS settings, and use SFC and DISM scans to fix file corruption—reinstall Windows as a last resort.

