

OneDrive is a cloud service app from Microsoft that comes with Windows 10 and 11. It lets you keep your files in the cloud so you can get to them from anywhere.
This means that you can easily sync your files across devices, including Android smartphones, iPhones, Mac or Windows PCs
OneDrive offers only 5GB of free space, and for more you need to pay.
But if you already use a different cloud storage, you might not need OneDrive. It can take up space on your computer and slow it down.
If you don’t want OneDrive, you can remove it or turn it off.
You can turn it off using special settings on your computer like the Registry Editor or the Group Policy Editor.
We will show you easy ways to uninstall OneDrive or stop it from running, making your computer work better for you.
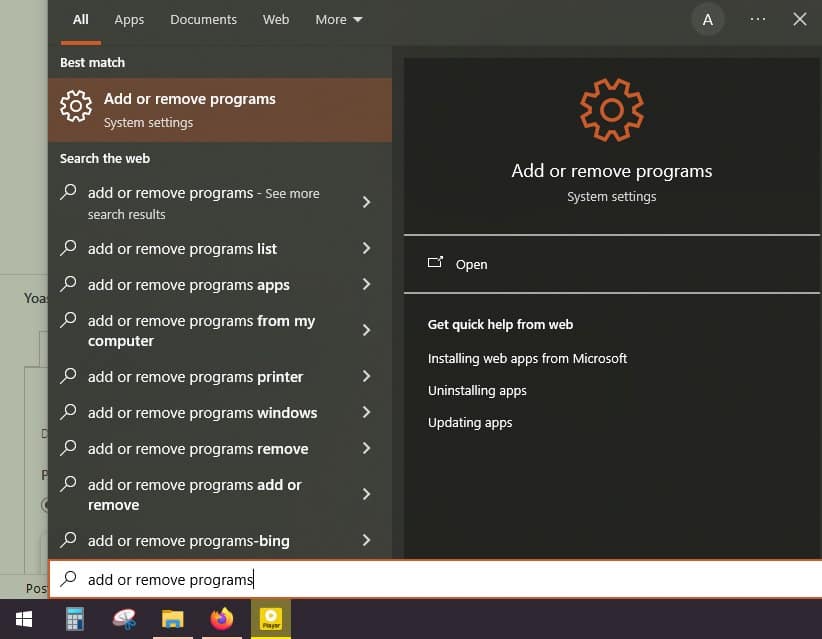
How to Uninstall OneDrive from Windows 10/11?
1. Go to Add or Remove programs from the Start menu.
2. Find and single-click on Microsoft OneDrive. Then Click on uninstall button, right next to it.
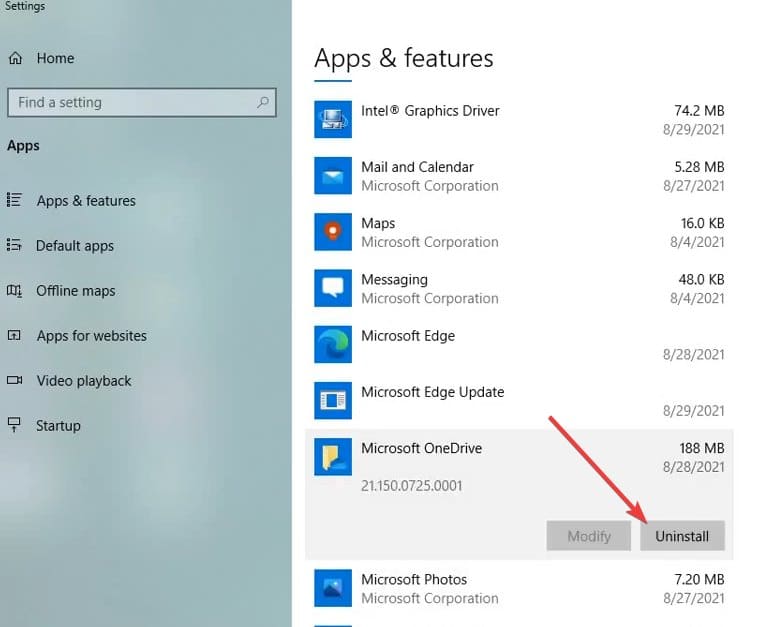
3. Now OneDrive will be uninstalled from your computer. You can restart the computer to make the final changes.
How to Turn Off OneDrive in Windows 10/11?
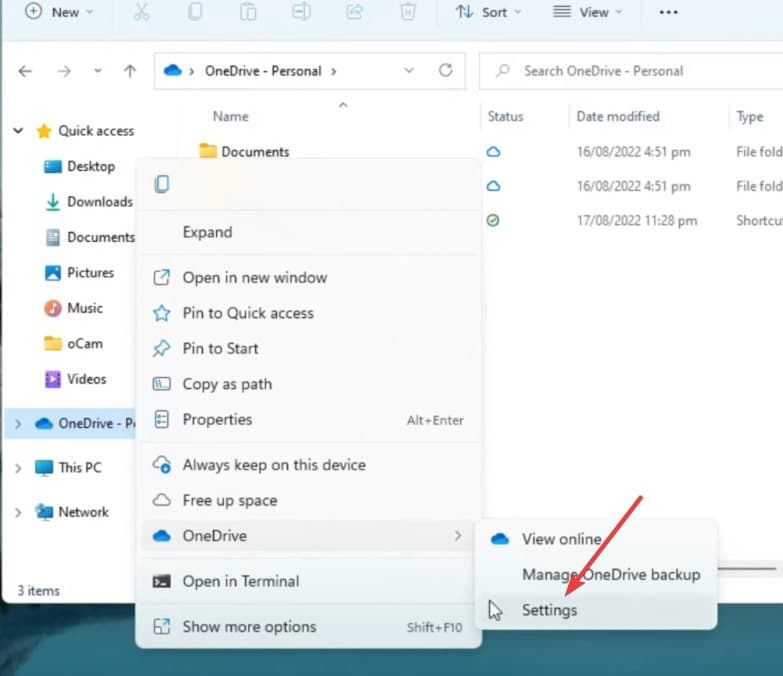
1. Open the File Explorer by pressing Alt + E.
2. Right-click on OneDrive from the sidebar and head to OneDrive > Settings.
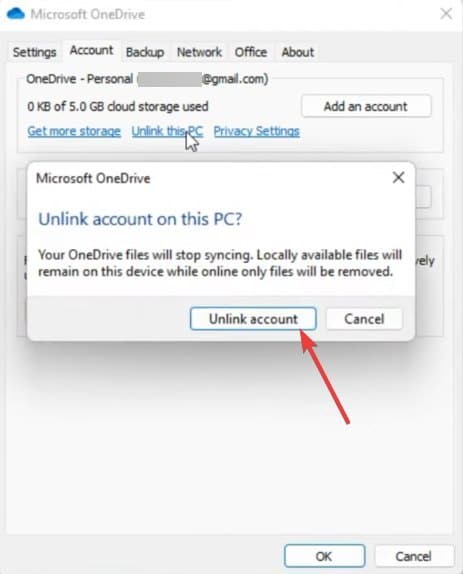
3. Now, click on Unlike this PC, given under the OneDrive Personal section.
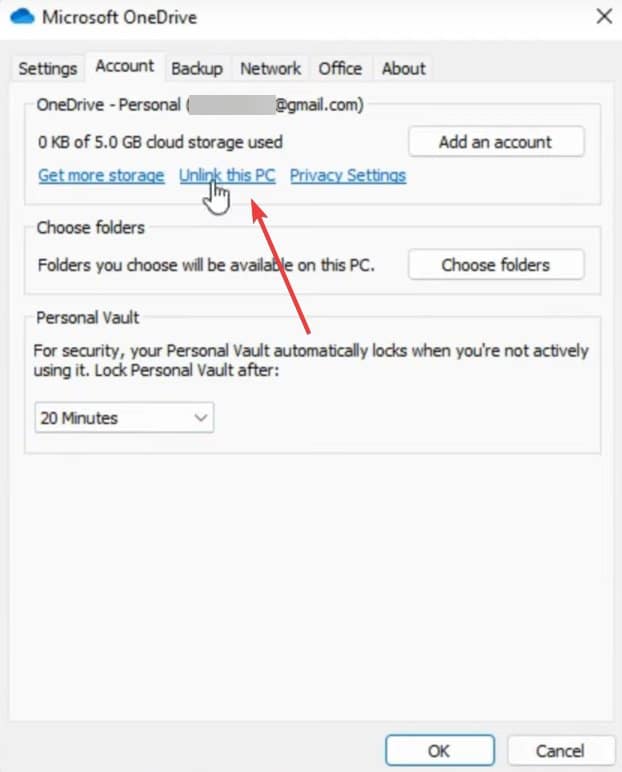
4. After that, click unlike account in the prompt to confirm.
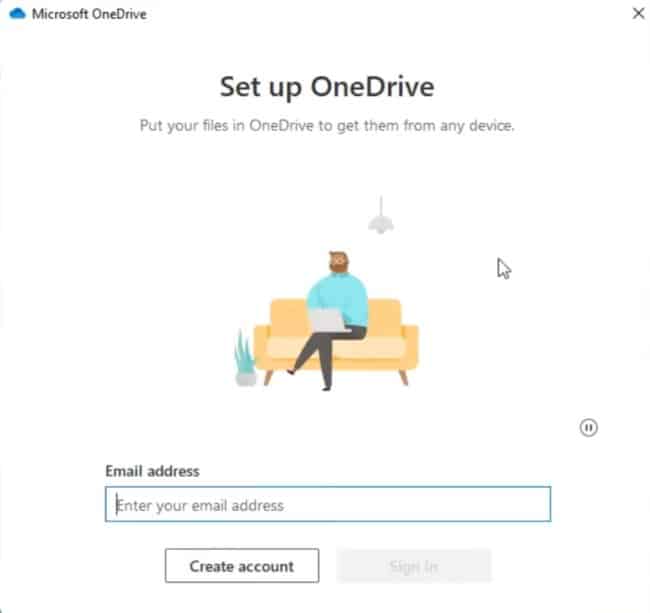
5. You will get the OneDrive login option now. This will confirm that you have turned off OneDrive on the PC.
Your files will stop syncing to OneDrive, freeing up cloud space and the internet bandwidth.
How to Disable OneDrive in Windows 10/11?
via Group Policy Editor
Note – Group Policy Editor is not available for Windows 10/11 home users, along with a few others. You can use the second method in that case.
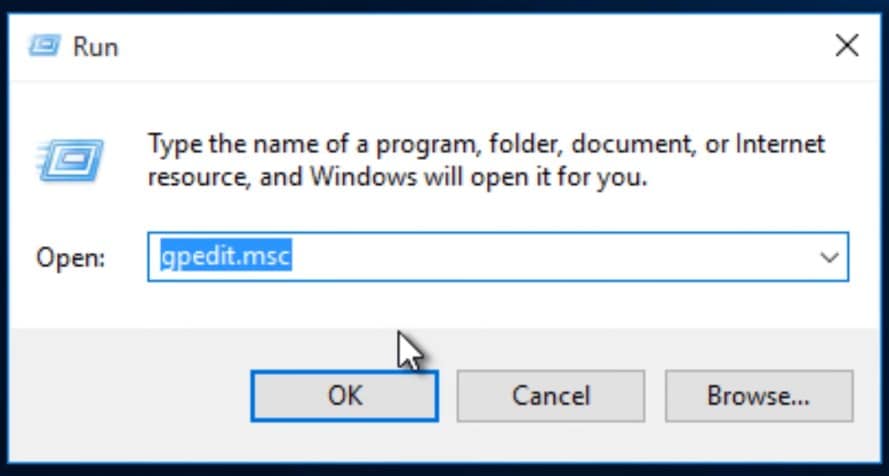
1.Press Windows + R to open the run prompt.
2. Type gpedit.msc and press enter to open the Group Policy Editor.
3. Now, head to Computer Configuration > Administrative Templates > Windows Components > OneDrive.
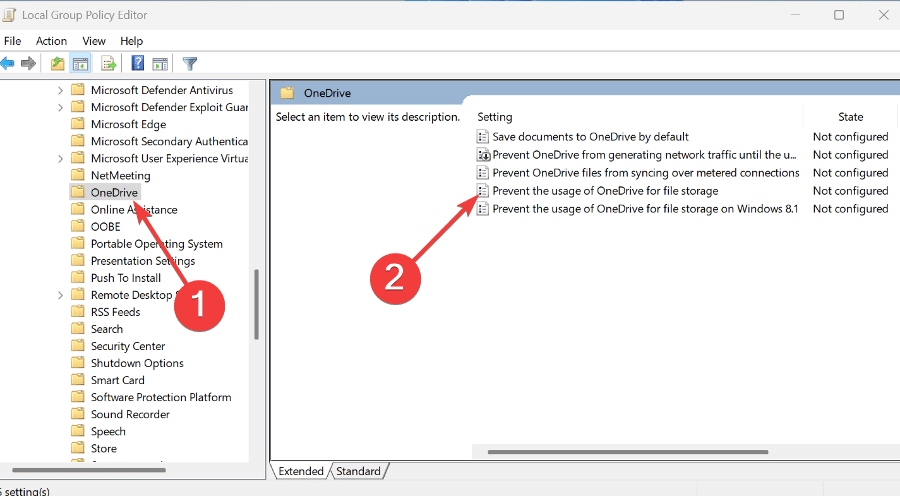
4. Find and double click on the policy “Prevent the usage of OneDrive for file storage“.
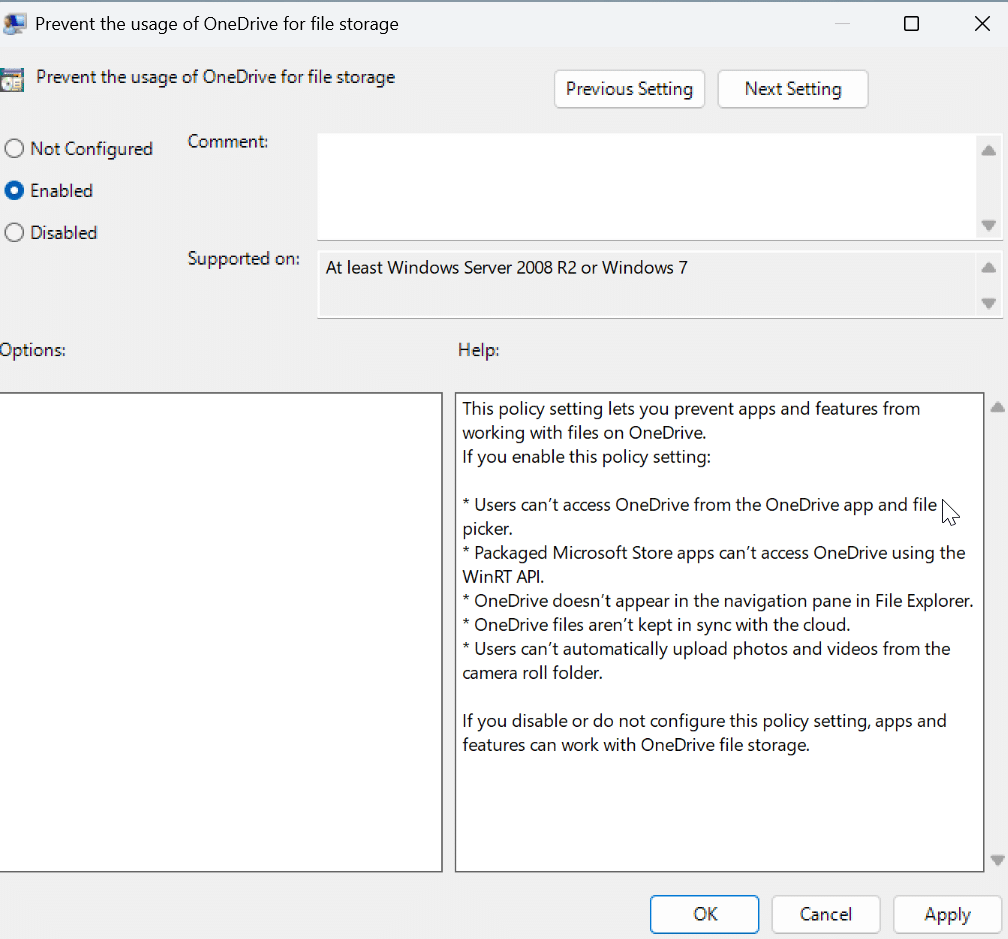
5. Select enabled from the options, which will disable OneDrive integration.
6. After that, click Apply to save the changes. Now you can restart the computer and it will be removed from the context menu.
via Registry Editor
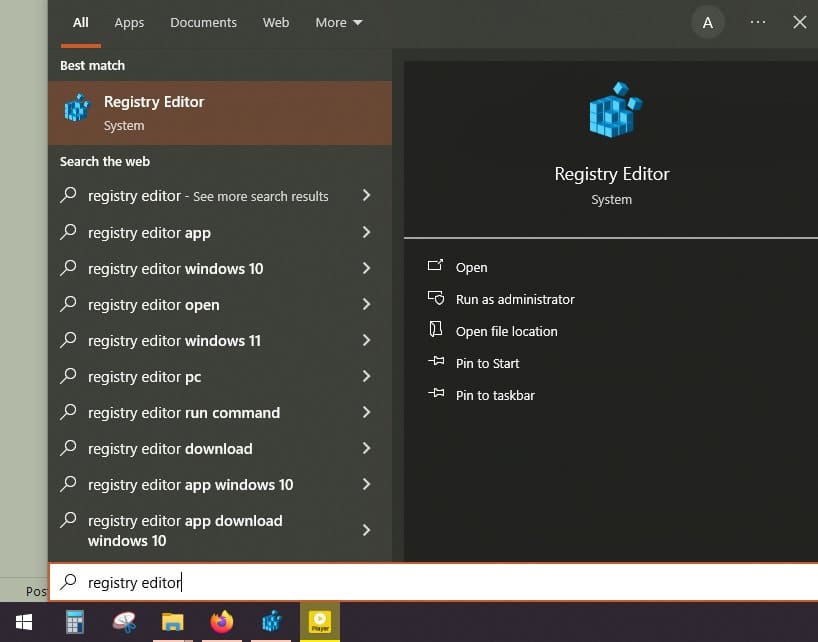
1. Open Registry Editor from the Start menu.
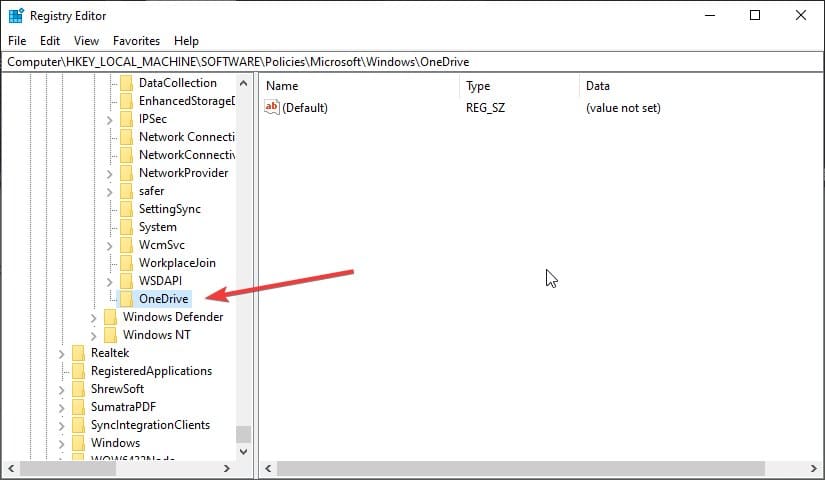
2. Go to the following address from the address bar in the Registry editor.
Computer\HKEY_LOCAL_MACHINE\SOFTWARE\Policies\Microsoft\Windows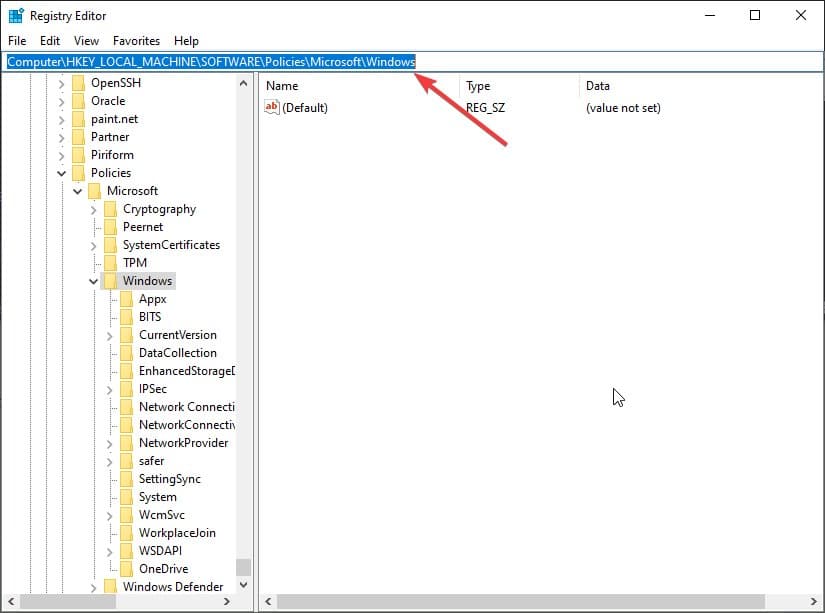
3. Create a new key through the right-click menu.
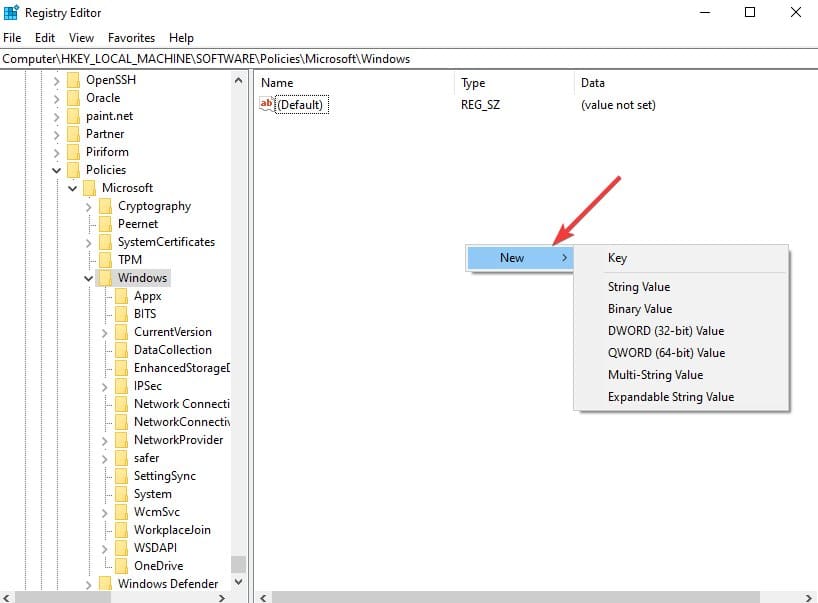
4. Rename it to OneDrive and press enter to save.
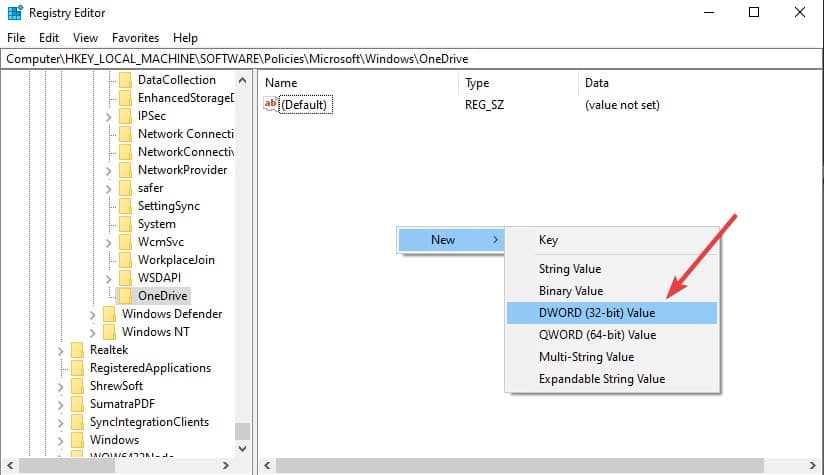
5. Click on OneDrive folder and then click on the empty area on the right to select NEW > DWORD (32-bit) value.
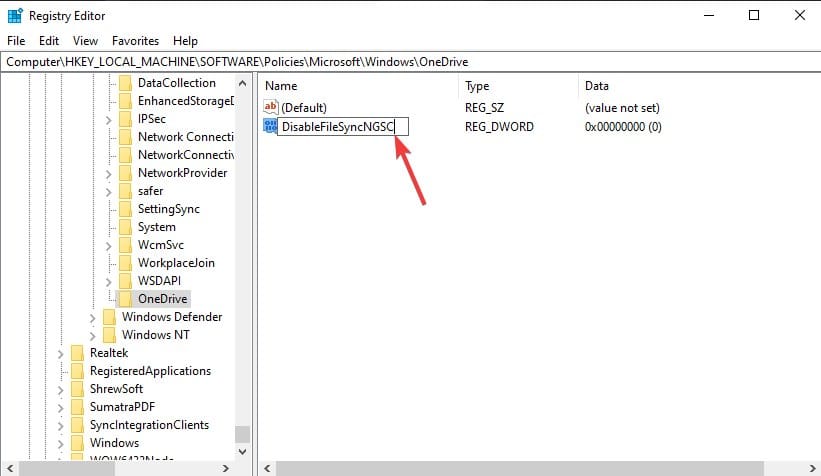
6. Selec the new key and Press F1 to rename the key. Renam it to DisableFileSyncNGSC.
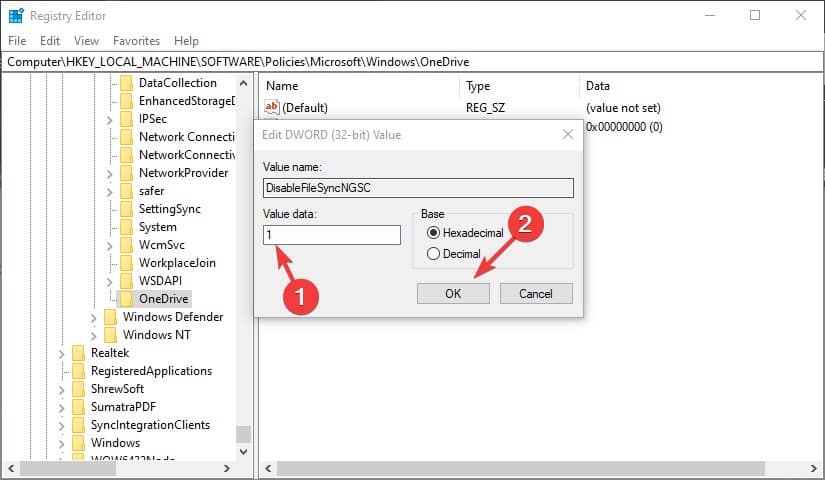
7. Open the KEY through the double click. Then change value data to “1”. And then, click OK to save the changes.
8. Restart your computer to see the changes in effect.
Remove OneDrive Now
So, this is how you can disable or uninstall OneDrive on your Windows PC. It will permanently apply the setting on the computer.
If you change your mind, you can always reinstall it from the Microsoft store.